LD Preset System
LightWave ProTools spotlight
Intro
LightWave has long had a preset system - open the Surface Editor and hit F8 and you'll see the Surface presets.

There are also presets for things like Flocking and HyperVoxels, but with the addition of the ProTools collection, in Layout, we now have presets for:
- Scenes
- Models
- Surfaces
- Nodes
- Images
- HDR images
- Motions
- Instancers
- FiberFX
- IES lights
- VDB objects
- Volumes (fogs, nebulae, explosions, etc.)
- Volumetrics(lights with visible rays)
- TurbulenceFD
Presets will have an icon and you can set a descriptive name. Each different type of Preset library will have a settings window that contains a search field, settings and additional information. Let's work through them one by one.
Before you start
Before you start adding your complete model library to your presets so they'll all be easy to access, have a thought about where your presets are going first. By default, presets are stored in the same place your LightWave config files are. Namely, your user folder on your boot drive. Normally, such drives don't have much space so it's a good idea to move your presets.
In Layout, go to the Preferences window by hitting O and going to the Paths tab or use the Edit menu and choose Paths Options...
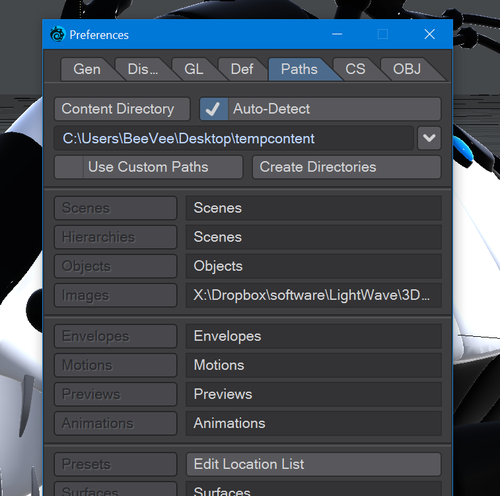
Click the Edit Location List button and a new window will appear.
Scene Presets
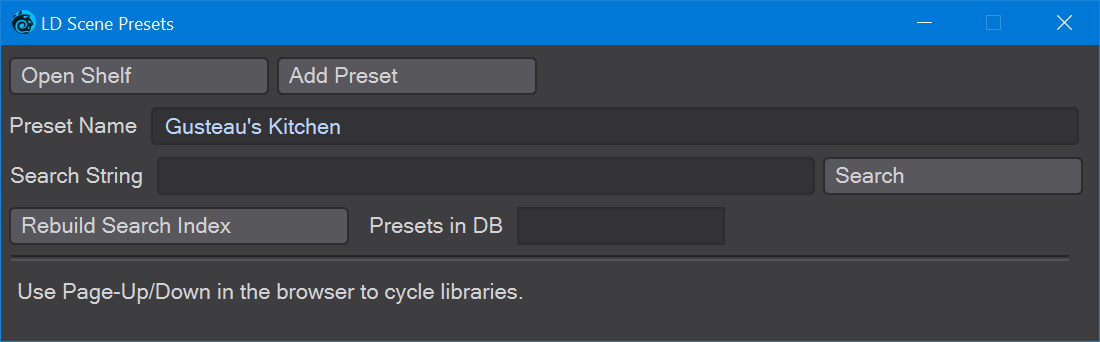
Scene presets is one of the simpler preset windows. At top left, there is the habitual Open Shelf button, then the Add Preset button. Underneath, is Preset Name label that you should use before you add preset. Under that is a search field so you can find your scene in a crowded window and lastly, there's a button to rebuild the database of your scene presets.
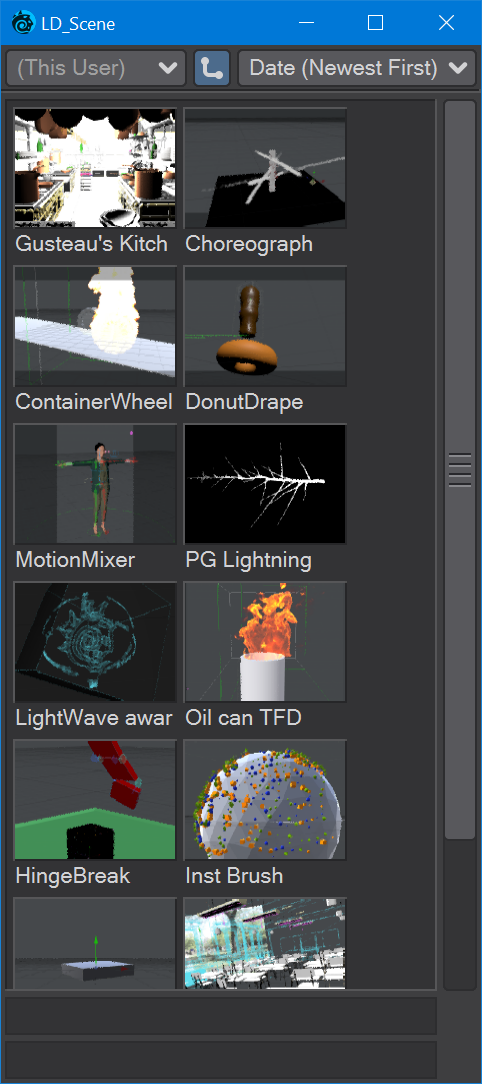
The presets window with some scenes I added. By default, scenes added here will have icons created from the OpenGL view, but you can swap that image either for one you prepared earlier, of using a VPR render. In common with other presets, you can change the name of the preset and add or move it to a specific preset library.
Model Presets
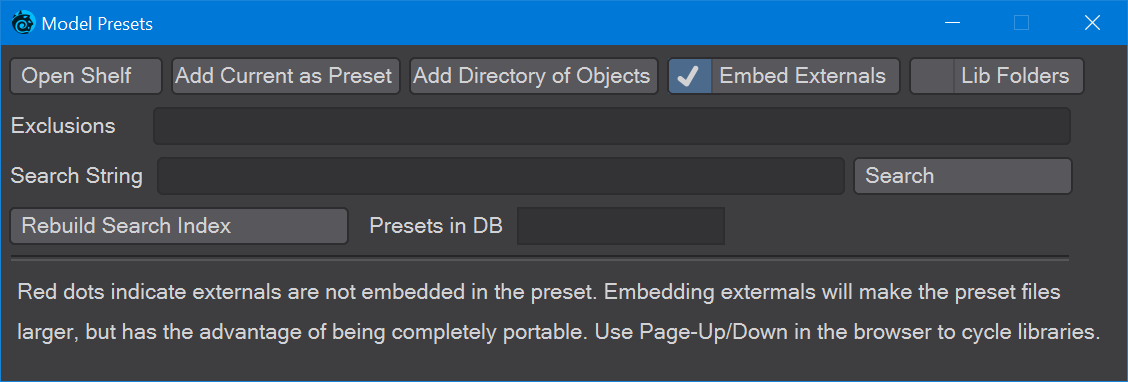
The Modeler Presets window has the usual Open Shelf button at top left, followed by Add Current as Preset. This adds the currently selected object to the preset shelf. The icon there is based on how it looks in the viewport - make sure you have a close-up of your object from a good angle. The icon will be based on the OpenGL view or VPR. You can also apply a loaded image, perhaps either an existing render or a standard icon. Better yet, you can add a Directory of Objects in one go. This can take some time, but there will be a progress bar at the bottom of Layout that shows you how far there is to go. Just adding the objects could result in a single huge folder of unrelated objects. If you want to be more organised, you can click Lib Folders to add all those models in subfolders based on their scene name
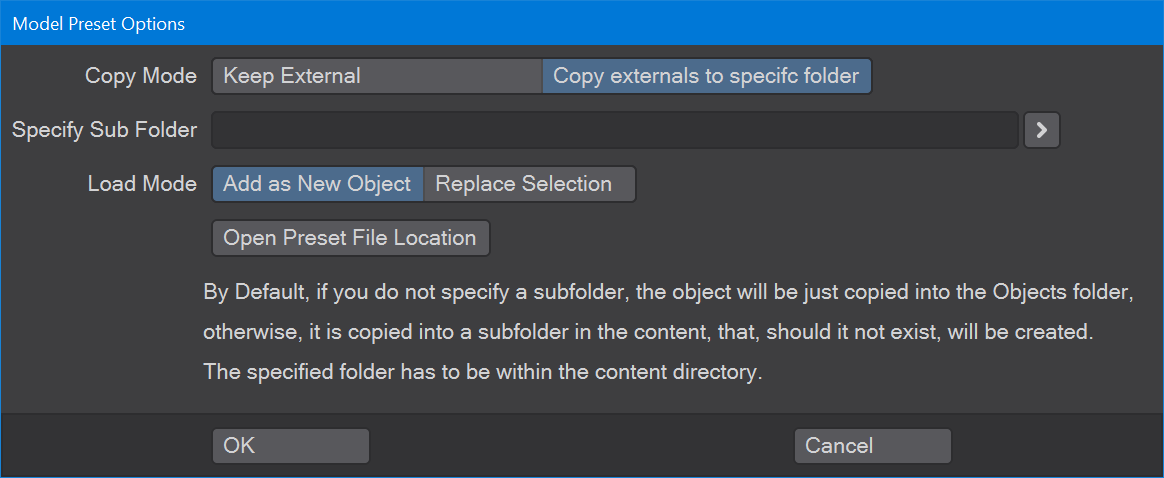
The Embed Externals option, checked by default, will create a preset bundle for your object containing the object and any other media needed for it - such as texture maps, video to project and so on. When you double click on a preset with embedded external files you will be presented with a new window, shown to the left. The first choice is whether to keep your preset's files external or copy them to the existing content directory. You can copy the preset to the standard Images, Objects, Scenes folder or you can choose to create subfolders specific to the model chosen. The next field is to name your subfolder. Next, you can choose to add the selected preset as a new object in the scene or to replace the selected object. This can be useful when you are using a proxy object to animate with but want the final high-resolution object for rendering. Under that is a button to open the preset file's location. You will see a numbered file that is an archive containing your object and all its dependent files.
Surface Presets
LightWave has had surface presets since LightWave 6, but they've always been limited to only working with procedural textures. Surface presets made with Pro Tools can contain multiple image maps that can be copied to the scene's content directory. Please note that images will be mapped onto the surface in the way they were created as a preset so you might need to do some judicious juggling to get your textures to look right in a different context. Lastly, please also note that the surface presets shelf will get replaced by the built-in surface presets shelf every time you click into the Surface Editor. This is just the built-in version taking precedence. You can re-open the Pro Tools version simply by clicking the Pro Tools presets window.
Node Presets
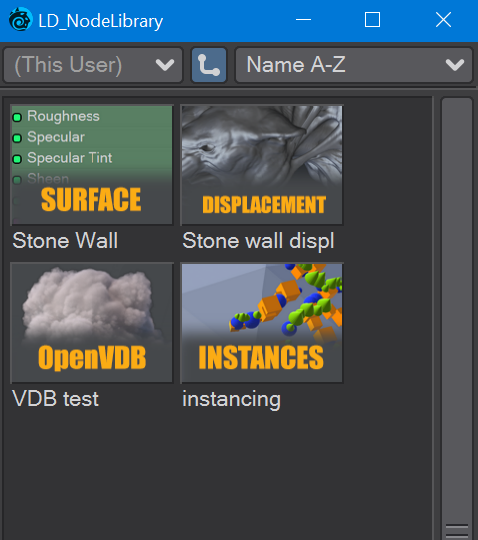
Node presets is a bit of a catch-all for areas where nodes are used, but they don't fall into any of the other categories of preset. Presets icons are shown with an image of what they are for, if possible, and text indicating what kind of nodal setup they will be used with. To add a node preset, you need the Node Editor open to what you want to save as a preset - just having the Instancer panel open is not enough to save an instancing node preset.
Image Presets
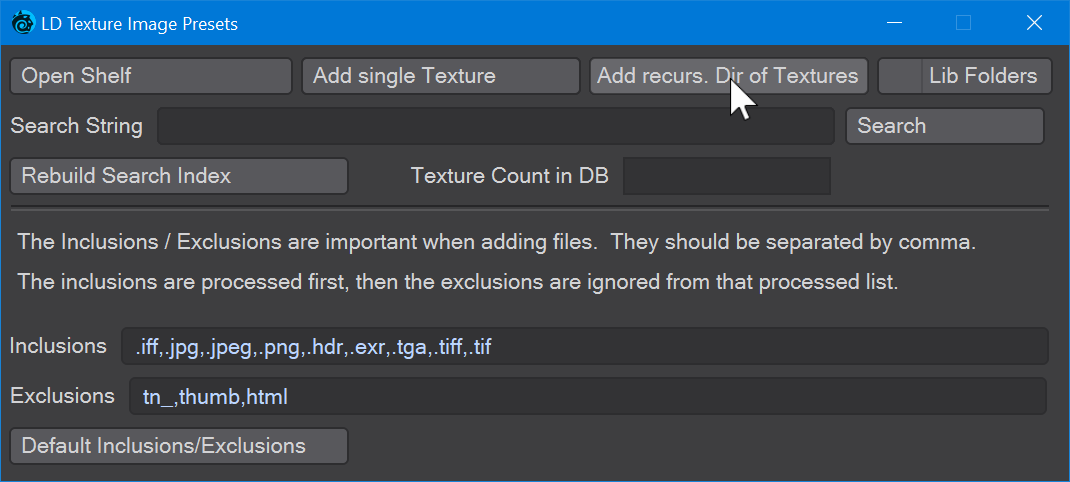
Image Presets can take any kind of LightWave-supported image type, though you might want to save your HDR image probes for their dedicated Presets Manager discussed below. As with previous preset managers discussed on this page, Image Presets consists of two windows. The presets shelf and a settings window. As before, the top left button in the settings window is for opening the presets shelf that goes with this type of preset - there can only be only Presets shelf open at any time. The second button is for adding a single texture image. In these days of PBR image sets, it's probably a good idea to organise your images on disk into folders named after the texture set. That way, you can use the recursive directory and Lib Folders check to create easily-readable texture sets. As before, there is a search field and a button to build a search database of your presets of a specific type. Lastly, you can inclusion and exclusion filters. When you use the recursive search, these filters are used to ignore files that don't need to be added to your preset library.
HDR Presets
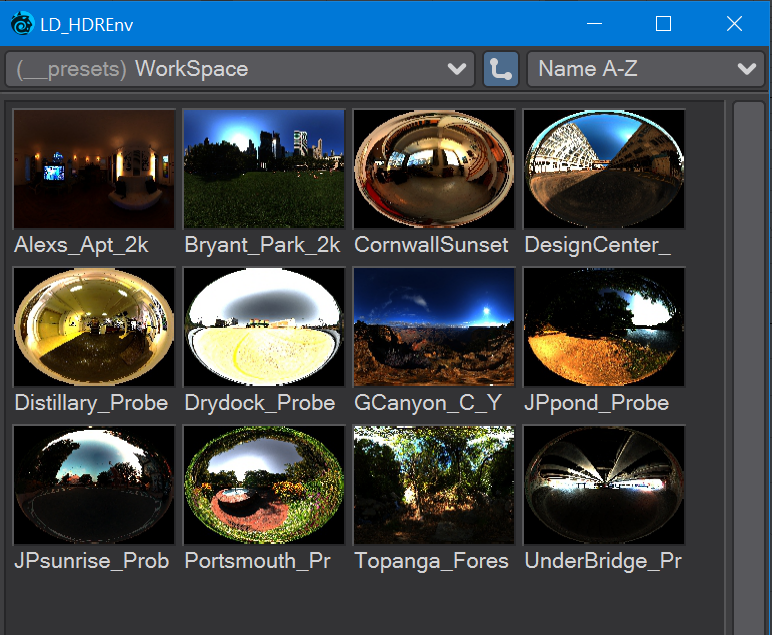
While you might want to continue using your Image Presets shelf to store high dynamic range images used for texturing objects, it's probably a good idea to use this separate HDR presets library for images that will mostly be used for scene backgrounds, that way they won't get lost. The set-up is the same as with other Presets libraries, but once you double-click a preset you will be presented with a new window.
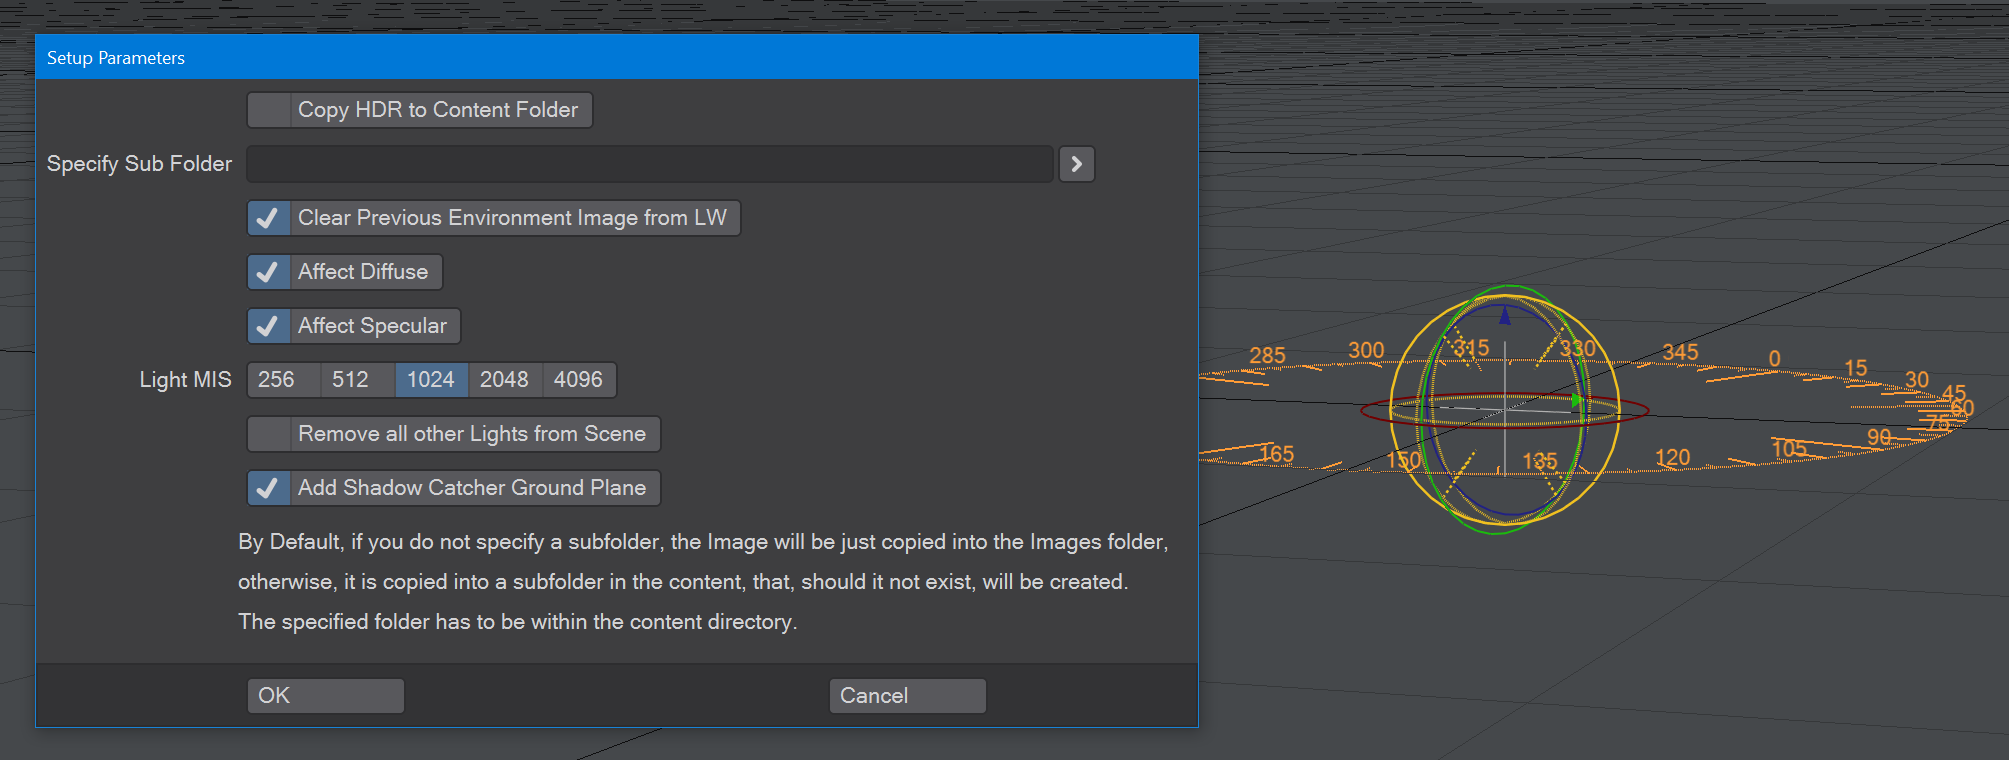
The first option here is whether to add the HDR image to your current content directory. Off by default, given that you might switch between several for different looks for your renders - you can always choose a new one from the presets shelf. If you decide to keep the image in your content folder, you can put it in a sub-folder like many other presets.
By default, the Clear Previous Environment Image from LW option is checked, referencing the fact you might switch between multiple images.
The next two options are for whether you want the HDR environment to affect Diffuse or Specular. Both are checked by default.
Next, you can set the level of MIS (Multiple Importance Samples) you wish for your environment. Experiment with this. Sometimes you can get away with fewer, but occasionally you need to raise this depending on the quality of the HDR image.
The next option is unchecked by default. Remove all other Lights from Scene will do just that if all you want is a simple product shot.
Add Shadow Catcher Ground Plane will do just that. It adds a null object, turned into a Plane Shape with a Radius of 1000m.
Lastly, a null controller object is also added with a protractor display so you can adjust the direction your HDR image is facing.
Motion Presets
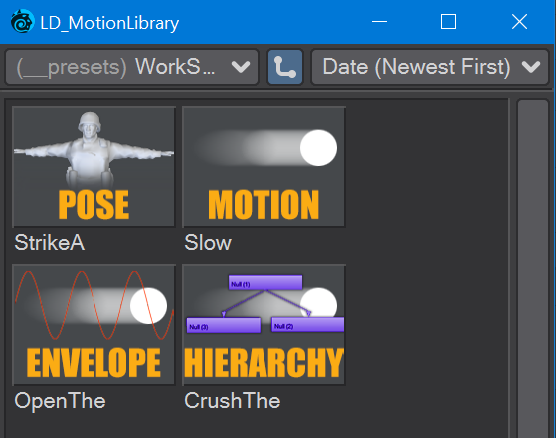
There are four kinds of motion presets as can be seen in the screenshot. You will need to select the right type to fit your needs since there isn't any current way of highlighting any particular type for saving as a preset. Even so, this will be a huge timesaver over the old method of saving the specific motion type to disk and reloading it when needed - particularly for a different content directory. Let's go through the various types, one by one. Mot or Motion presets can be created from any keyframed Layout motion. Env or Envelope refers to the contents of any E button. You will be presented with a list of channels to choose from. HMot or Hierarchical Motion refers to parented motions and Pose refers to a Preset saved from a rig.
Instancer Presets
The first important thing to note about Instancer presets is that each double-click on a preset will add a new instancer to your Object properties. The second thing is that whatever the size of the object that you are using with instances, the number of instances is based on the surface area, so the quantity will adjust to fit. This can mean that if your target object is too small, the instances won't fit. The preset will not scale the size of individual instances, just the quantity distributed.
The next thing to note is that the image made for your preset will be whatever view you have of your instancer in the Layout viewport, so make sure it can be easily understood as a preset.
Last thing. If the object you are instancing has multiple layers, they will be duplicated with this preset right now. This means that if you are using a seven-layer object as your instance items (as I have done), you will have 49 items in the scene editor. For now, split multi-layered objects into discrete objects.

When you double-click on an Instancer preset, a new window will appear with several checkboxes. The first, Copy externals to current content dir, will copy objects and images to your current content directory. The second, Keep Existing Setup and add new instances, will not overwrite any existing instances, but add a subsequent instancing setup. The third, Set Source Item State as Inactive, makes sure that instance base objects from the preset will not appear in renders or OpenGL.
FiberFX Presets
coming soon
IES Presets
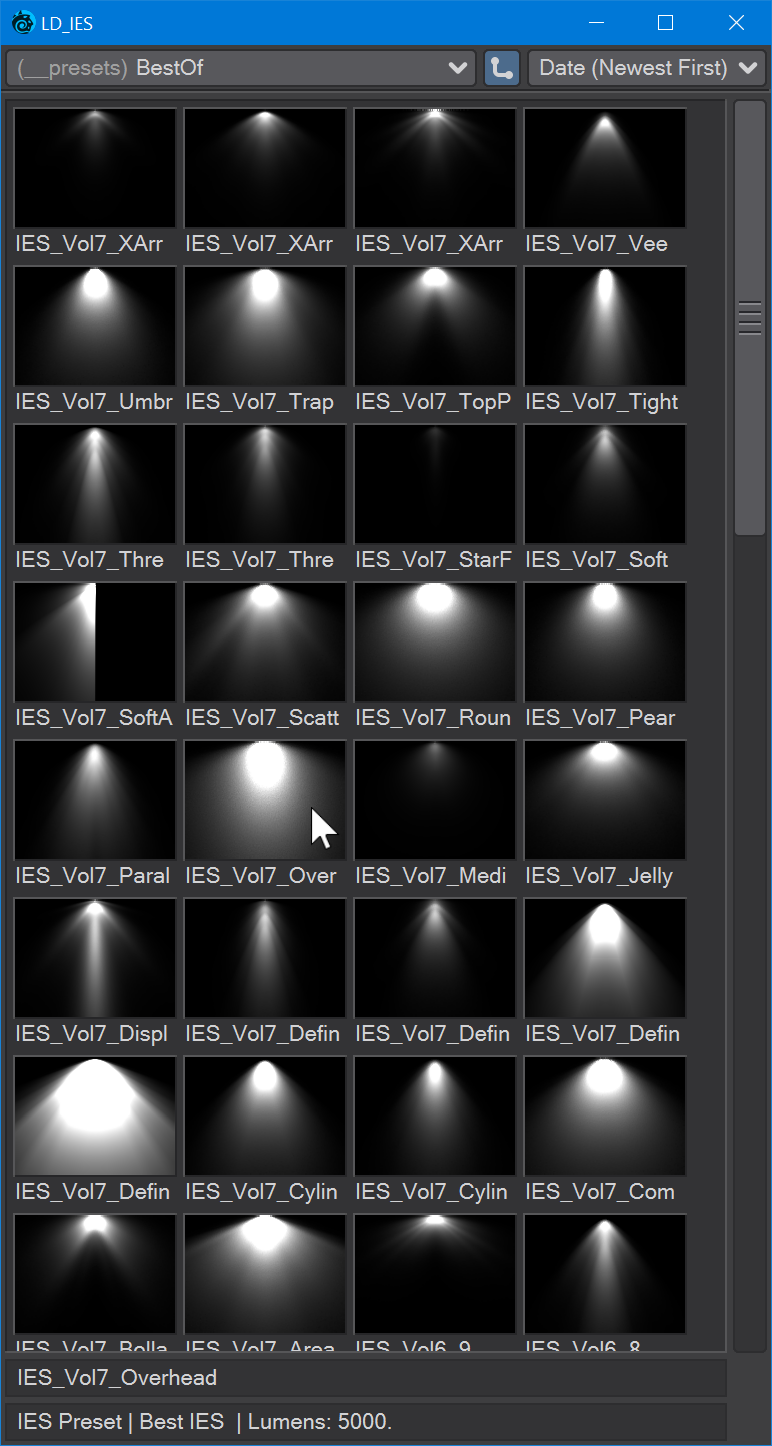
LightWave's Photometric lights can load perhaps millions of .ies files created by lighting companies to act as digital versions of their products (have a look here for a good resource - https://ieslibrary.com/). ProTools can put a large catalogue at your fingertips with the IES Preset shelf. To add an IES light to your shelf, click the Add single IES button or use Add recursive Directory of IESs if you have a folder full. LightWave will automatically generate the thumbnail shown and you don't even need to worry about the original IES file. Its content will be stored in the preset meaning individual lights can be easily shared. Double-clicking on a preset will apply the chosen light type to the currently selected light in Layout. Lastly, the search function works like other presets, with one addition. If you preface your search term with #lumens and the brightness you want, the library will find all the lights of your requested brightness. (If you receive an error message Rebuild your Search index)
VDB Objects
coming soon
Volumes
coming soon
Volumetrics
coming soon
TurbulenceFD
coming soon