ChronoSculpt
Time is Finally Relative
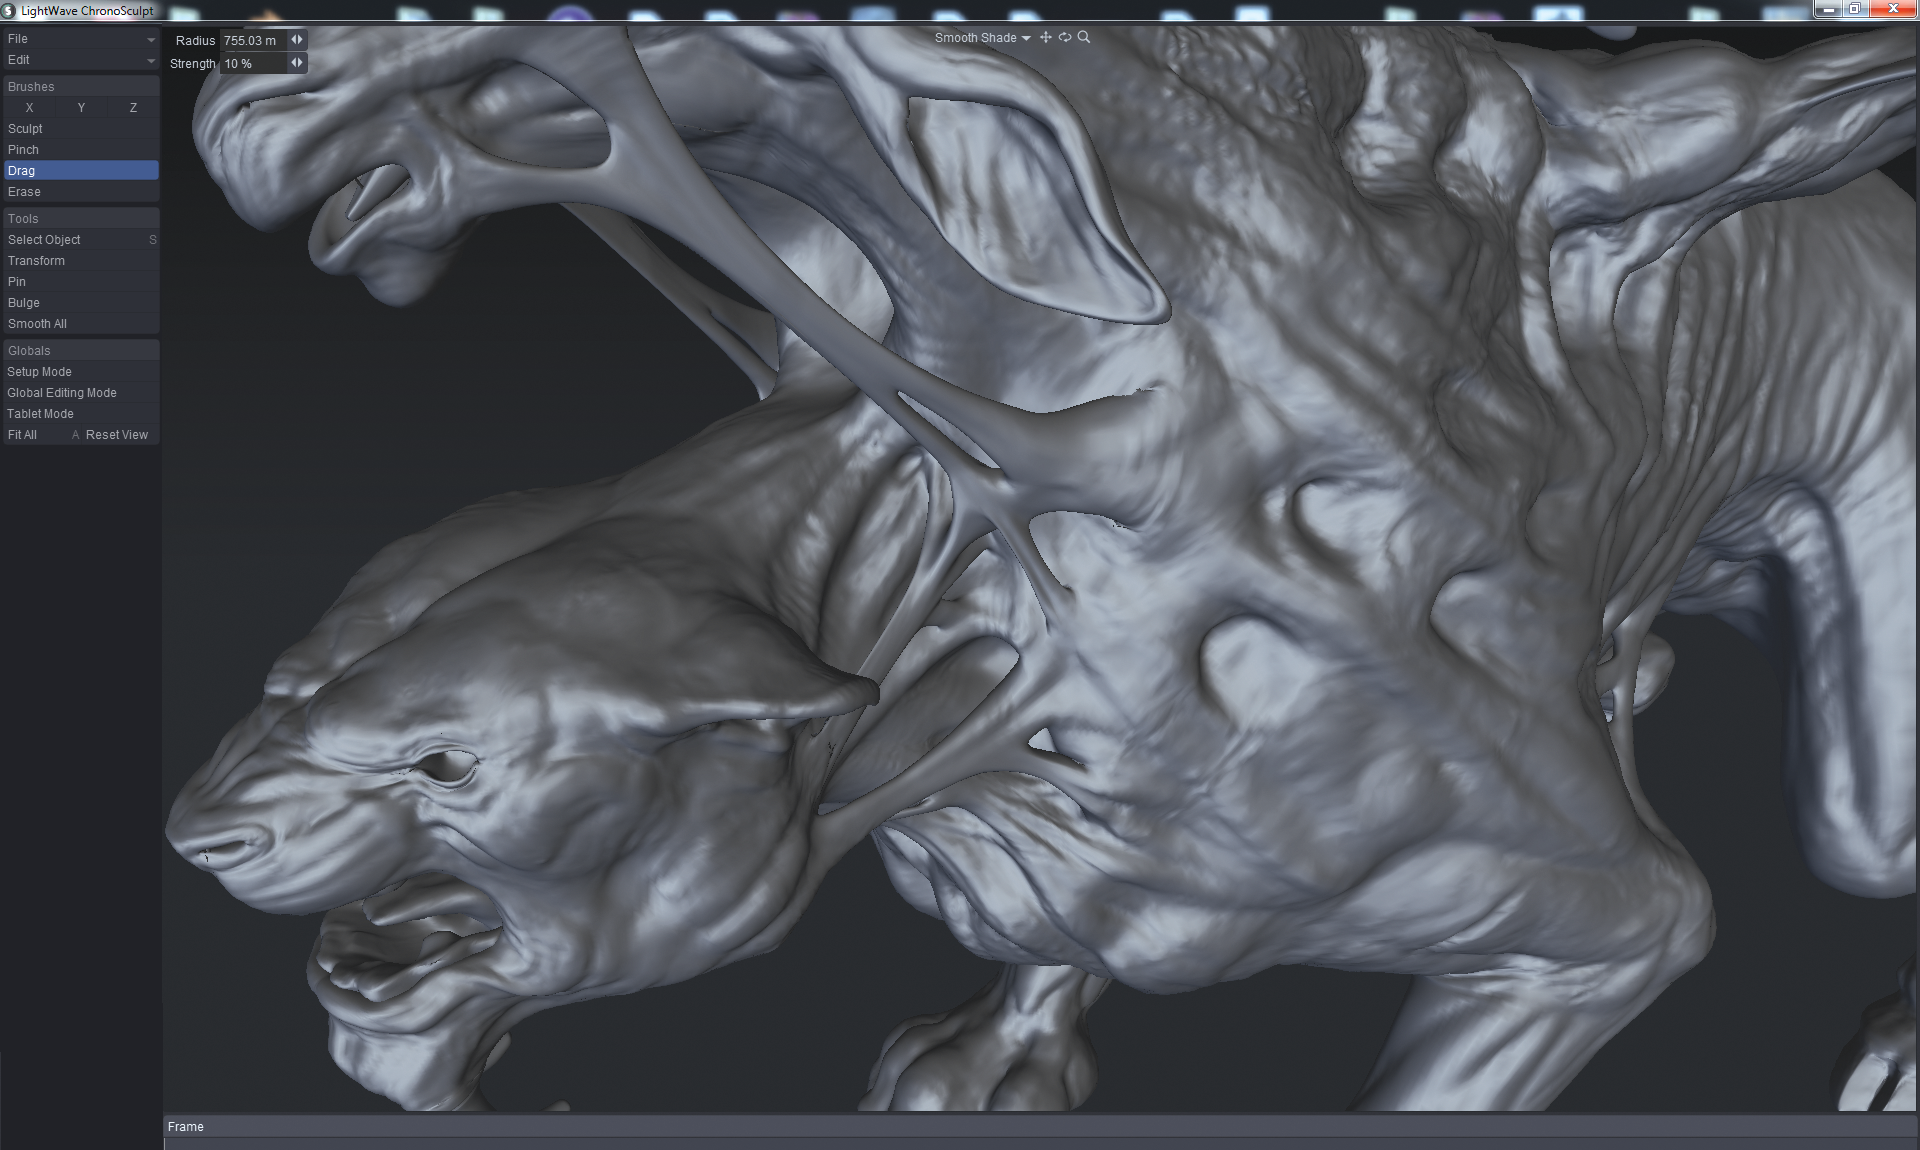
ChronoSculpt is a powerful stand-alone application that revolutionizes working with animation and dynamic simulation cache files from any application by allowing you to use sculpting and transformation tools over time. ChronoSculpt also introduces a radical new geometry engine based on our “Hydra” technology which allows the deformation and manipulation of 8-12 million polygon objects with ease.
Using industry-standard vertex cache files in Alembic, LightWave MDD, or Autodesk Geometry Cache formats you can easily paint out errors on your dynamic simulations or completely change the look of a character either with layered sculpting “clips” in the timeline or globally to affect every frame in your cache animation.
ChronoSculpt could potentially save you hours of work by allowing you to quickly make changes to the baked dynamic simulation cache files to address simulation jitter, and soft-body penetrations, or to remove stray simulation pieces and get the shot out the door.
ChronoSculpt also allows you to export your sculpts and deformations as LightWave endomorphs or OBJ objects (for Maya blend shapes) on your character or object geometry to allow unique character animation effects or visual effects deformations in your main application.
Introduction
- Revolutionary Time Sculpting - quickly and easily removing dynamics simulation errors, jitters, or layer sculpted deformations on simulation cache files from most 3D software packages.
- Sculpting Tools - Use tools like Sculpt, Pinch, Drag and Erase to deform and manipulate your geometry over time.
- Transform Tools – Move individual geometry parts over time within a dynamics simulation cache using tools like Transform, Pin, and Bulge to help you complete your projects quickly.
- Enhanced Geometry Engine - Handle massive (8 - 10 million polygon objects) geometry files with ease.
- Universal File Support - ChronoSculpt supports LWO, OBJ, LightWave MDD, Autodesk Geometry Cache, and Alembic for easy integration into software pipelines.
- OBJ Blend Shape and Endomorph Export – Easily save any frame from the ChronoSculpt timeline as an OBJ for Maya blend shapes or as an Endomorph directly to your LightWave object files to create facial morph targets and deformation effects.
- Clip Timeline - Quickly reposition and adjust the length of your “sculpts” anywhere in the timeline to get the perfect effect on your cache animations or make global changes that apply to the whole animation.
ChronoSculpt Getting Started Tips
- Use Ctrl+Tab to cycle through your selected objects. ChronoSculpt supports multi-layered LWO objects and you can load multiple stand-alone OBJ or LWO objects as well. You can also click on the Switch Object button on the side menu as another option or use the Select Object tool (Keyboard shortcut: Shift+s).
- ChronoSculpt loads geometry cache data as a clip on the timeline. You can add as many as you want, drag them around, scale them, fade them out, etc.
- Select a clip in the timeline by clicking on the colored dot for that clip. The clip will expand and allow you to change the start and end frame.
- Drag a start or end frame by hovering your mouse over the first or last frame of the clip in the timeline. To move the entire clip in the timeline click and drag on the center colored dot.
- The three numeric fields to the left of the timeline are the start and end frame for the timeline and the bottom field (defaulting to 30) is the frame rate which is used only for playback speed.
- You can click anywhere in the timeline to set the current frame or use the left and right arrow keys on your keyboard to step through the timeline. Clicking with the mouse on the timeline will snap to integer values. Shift+Click will allow you to go to fractional frames. Transport controls can be hidden or revealed using the Show Transport toggle at the bottom of the tools list
- When you save a project it saves everything in the ChronoSculpt session. If you have 10 objects all animated and with their own sculpted clip modifiers on top of the cache files they will all get saved.
- You don’t have to start with a cache file loaded in, you can just load an object and use the tools in ChronoSculpt to deform and manipulate it. Then you can save that file out to a cache file and in effect create a cache of your sculpts from scratch.
- The Pin tool allows you to pin an object or object part position for a length of time so that it does not move. This can be useful for correcting jitter on dynamics simulations for example. Just activate the Pin tool, go to a specific frame and click on the part that you want to pin. That will create a pin clip in the timeline whose Ease Out and length can be adjusted or moved in the timeline.