Getting Started with Octane Render
Using your NVidia GPU to render images
Octane is a GPU-based render engine that has been around for a few years now, but most LightWave users will have never used it. It also has quite a different method of shading, lighting and even camera than LightWavers are used to. Nothing is too tricky, but it will involve you using the Node Editor. To start, let's look at what graphics hardware you need.
On Windows, the minimum generation you need to use Octane is the Nvidia GTX9x0 series (or Quadro equivalent) graphics cards, nothing before will work. Please be sure to use an NVIDIA Studio driver of least version 456.38. Lastly, AMD or Intel chipsets are not supported by Octane.
On the Mac, AMD, Intel and NVidia chipsets are supported, but require Intel Skylake GPU, AMD Polaris/Vega/Navi GPU or Apple M1 GPU on macOS 11.2+
Lastly, this page is purely a getting started guide. For documentation on individual elements, you should consult the Otoy Standalone manual in conjunction with their slightly outdated LightWave wiki.
Start small
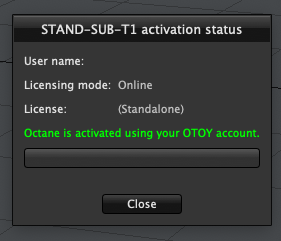
To begin with, you need an Otoy account, otherwise, you won't be able to use Octane. It's free and is used for all your licences. Go to the Otoy website and click on the SIGN IN link at the top right. Go to the bottom of the page and sign up. Otoy also requires you to set up an Otoy forum account. Once you have these, load Layout and sign in to your Otoy account. You will then receive one of two windows:
or
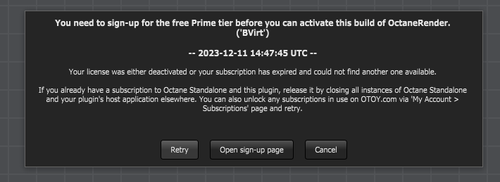
If you get the first window, you are ready to go! If you get the second window, go to The Otoy Free Tier page and you shouldn't need to do anything further to set up your LightWave Octane free licence. You, too, should be ready to go.
To begin using Octane, start with a single object in an empty scene or a simple exterior shot. As said before, the way Octane works with lights is not the same as VPR, so don't go straight for converting an interior scene you did with complex lighting requirements until you're a bit more comfortable with how Octane works.
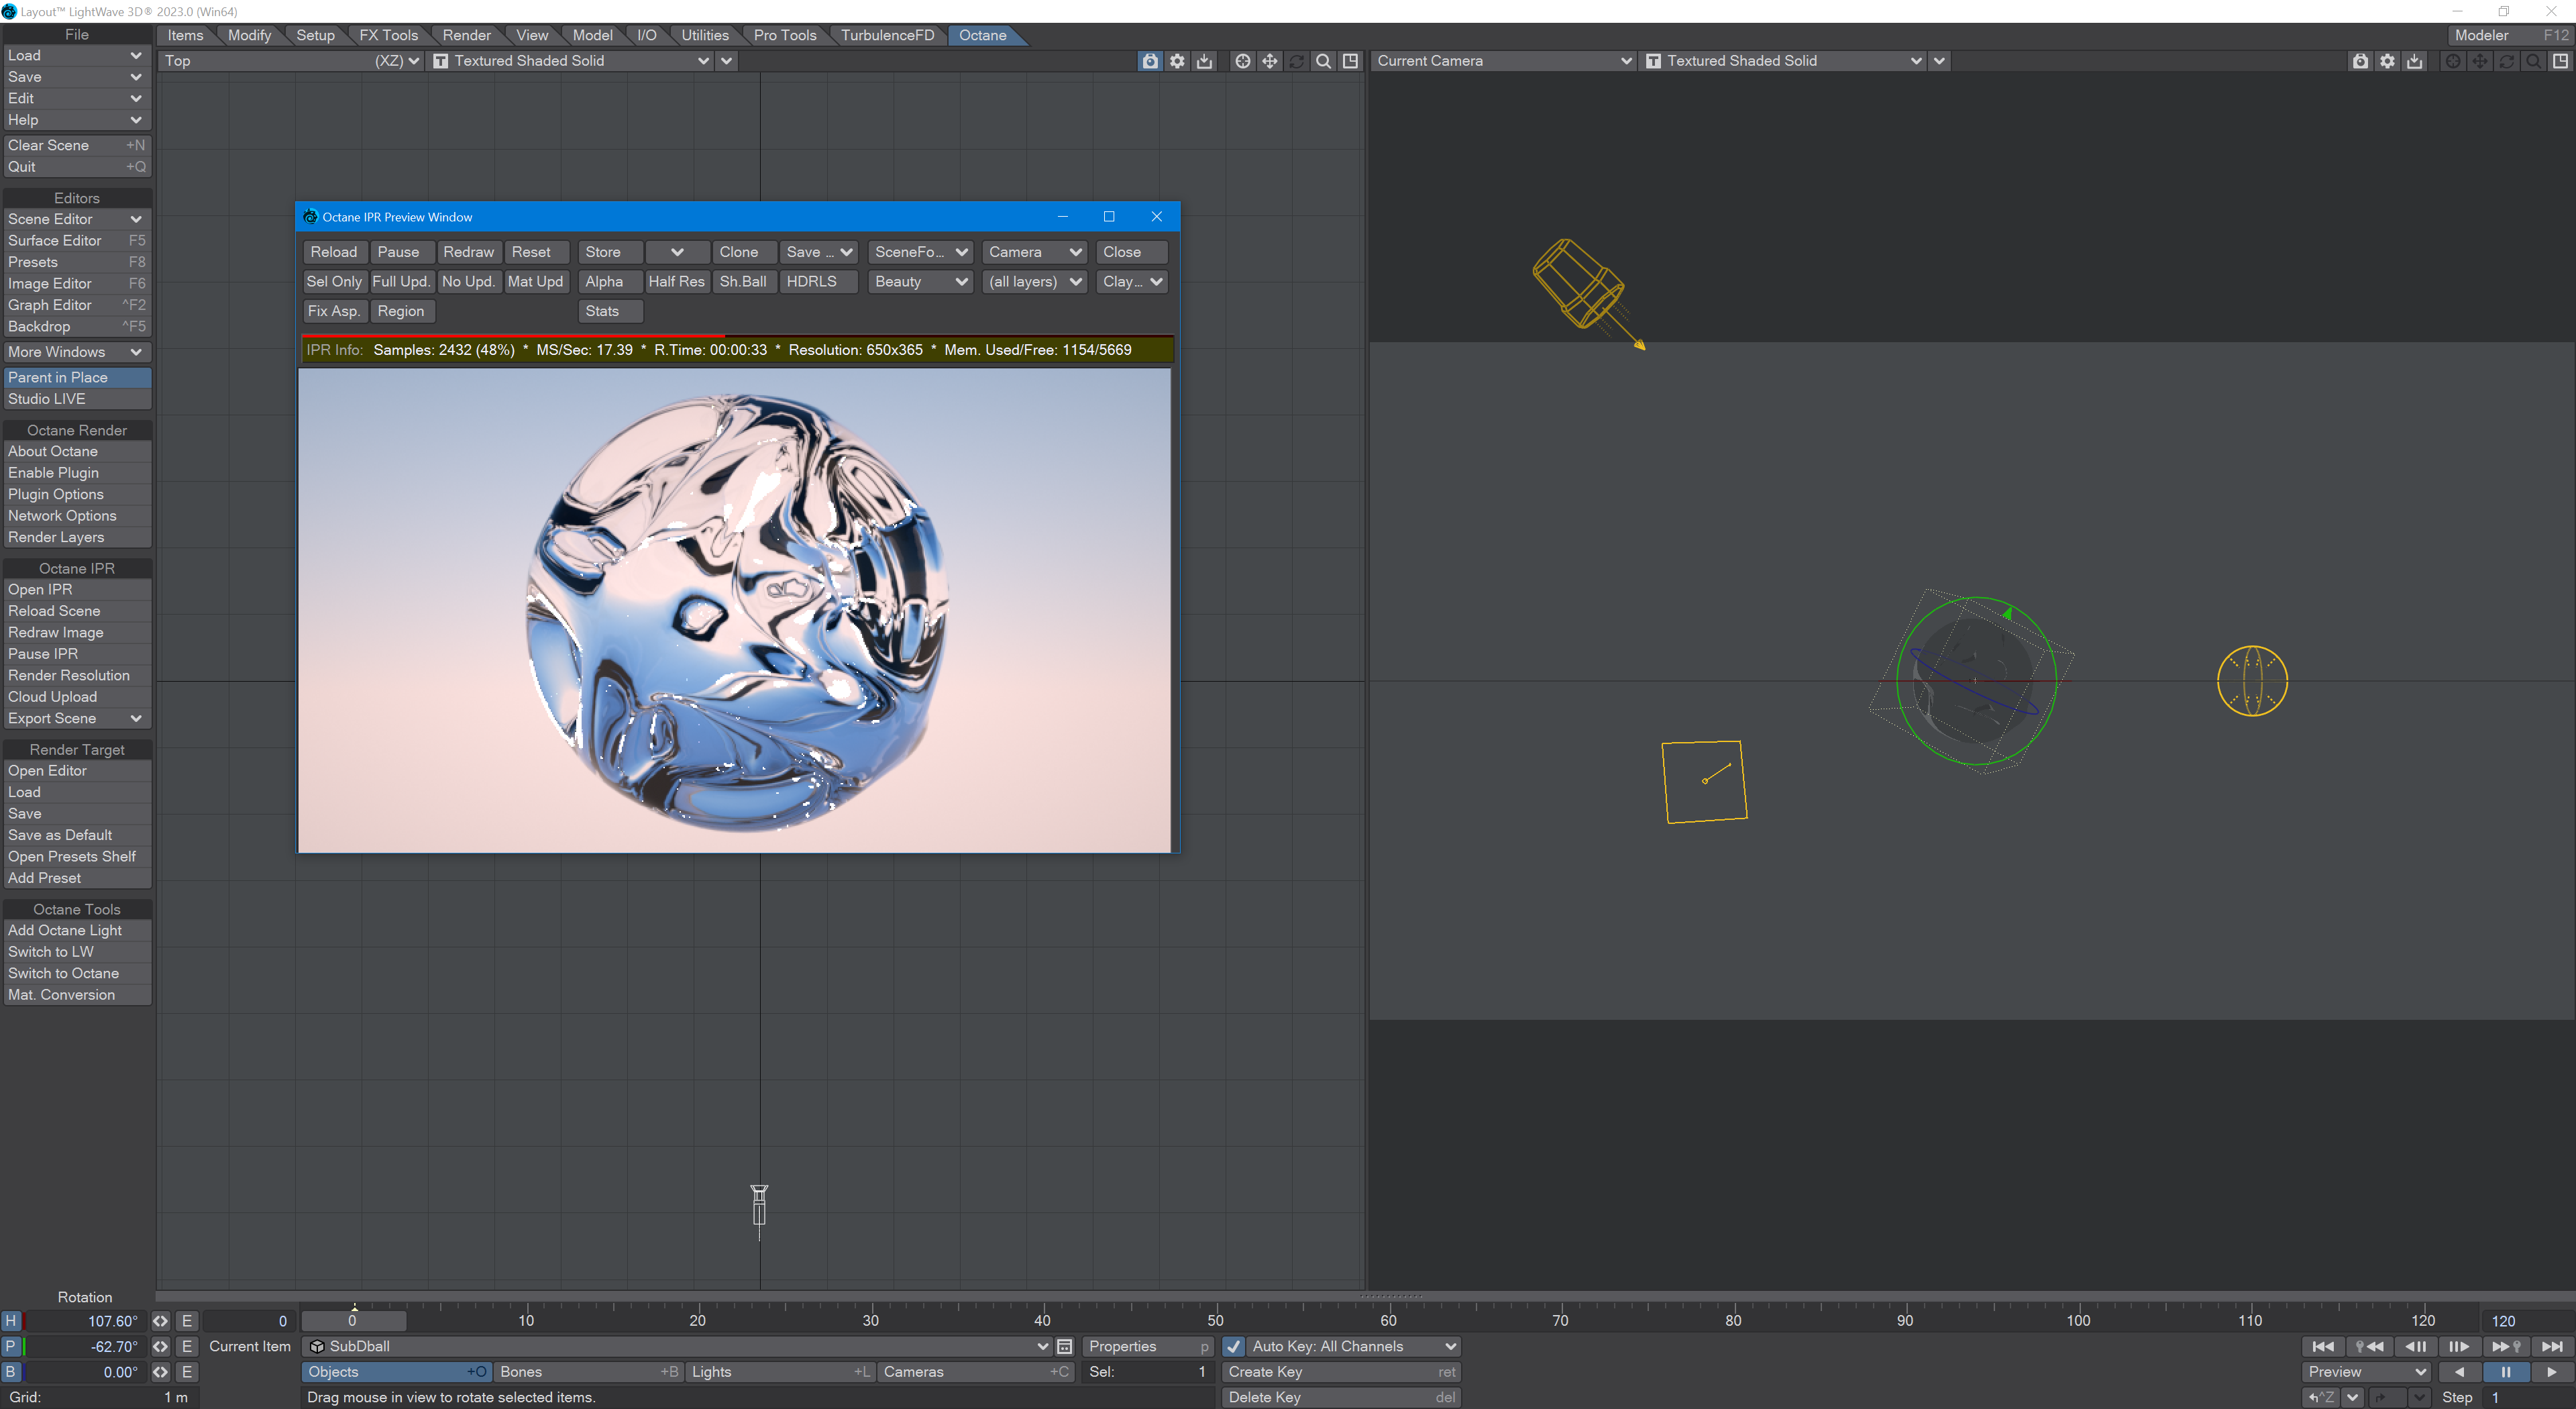
Just a simple object using the Octane Specular material, an Octane light (plus the two LightWave lights that are not contributing here) and the Daylight environment in the Render Target, discussed next.
Render Target
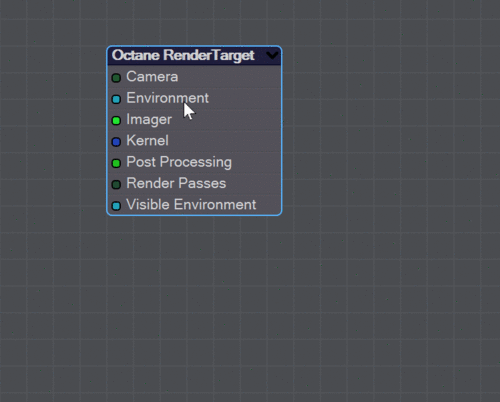
The way Octane works is different to LightWave, but all the controls to create a render can be found in the Render Target node editor. Click Open Editor on the Octane tab and you'll see a node editor with this destination node:
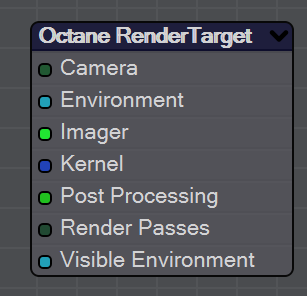
Octane's IPR works right away. You can save an image from it immediately - without needing to get involved with Octane's inner workings - but the rewards are great if you do. Right-click on this destination node to get several default setups in the Node Menu submenu, like so:
These presets will get you good-looking renders, but let's go down the nodes one by one.
Camera
There are four different cameras to choose from:
- Baking - This is for creating textures for UV-mapped objects
- Panoramic - Used for creating images for VR, there are Spherical, Cylindrical, and Cube Map options
- ThinLens - Probably the camera type you'll use most frequently. It can function as a Perspective, Orthographic or Shift camera and can generate stereographic images
- Universal - Similar to ThinLens, but with far more options
Environment
There are three nodes you can hook up to the Destination node:
- Daylight - This creates an outdoor environment with settings like LightWave's SunLight, but with more control
- Planetary - Creates a space environment for science fiction or fact scenes
- Texture - Similar to using LightWave's Image World
Imager
There is only one node to input here, Imager: Camera. It gives you loads of further control over how your renders look, from exposure to the white point, with vignetting and denoising built-in.
Kernel
This is a vital setting. It controls what methods will be used for rendering, a little like LightWave's choice between straight ray tracing, Brute Force or Irradiance Cache. Octane's choices are thus:
- DirectLighting - A rapid preview render that can be simply ray traced or use ambient occlusion
- InfoChannel - A diagnostic tool rather than used for final renders, InfoChannel gives you the information you need about scene items
- PMC - is a custom mutating unbiased kernel written for GPUs, according to Otoy - the makers of OctaneRender
- PathTracing - is a different solution to PMC, but equally performant
These are your most important inputs for control over how your render looks. Octane offers additional control with Post-processing, Render Passes and the Visible Environment inputs.
Surfacing
Octane materials are usually more complex than LightWave's own so it's good to have a translation:
- Composite - Mixes several materials using masks.
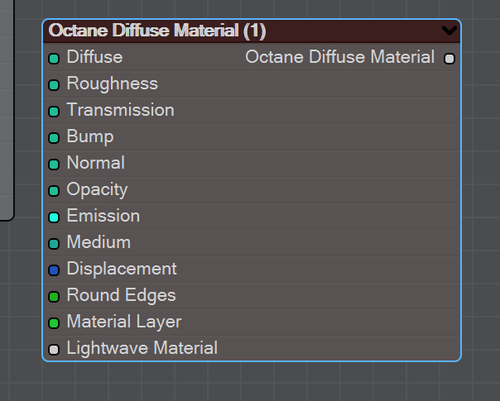
- Diffuse - Used for rough, non-reflecting materials or mesh emitters (luminous surfaces)
- Glossy - Used for shiny materials such as plastics or metals
- Hair - Designed for hair and fur objects.
- LightPortal - Designates openings in scenes to allow the render kernel to better sample light from those areas.
- LiveDB - see below
- Material Mixer - Mixes any two Material types.
- Metallic - Similar to the Glossy material, except by default it exhibits more metal-like characteristics.
- Shadow Catcher - Used like LightWave's own Shadow catcher shading model.
- Specular - Used for transparent materials such as glass and water
- Universal - Brings Substance maps and PBR outputs into OctaneRender. This is Octane's version of LightWave's PBSDF material and will probably be the material you use most.
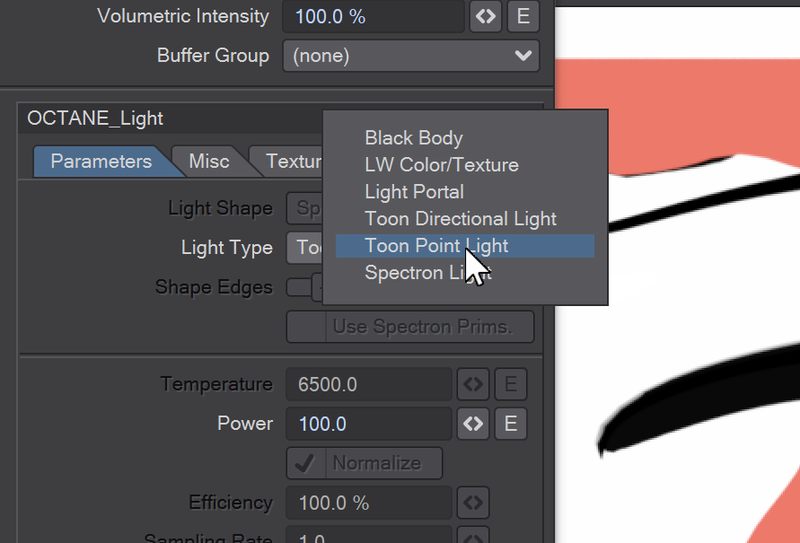
In addition, Octane has a Toon material:
- Toon - Designs cartoon-style surfaces.
- Toon Ramp - Controls shading on the model. To use this material, you also need to use Toon lighting in the scene. Add an Octane Light and in the Parameters tab, select a Toon Directional or Point Light.
LiveDB
We wanted to cover the LiveDB Material, which comes with Octane's material library, separately. If you use a 4K monitor, you should know the UI is not scaled. This is an easy way to get good-looking surfaces as a starting point for your Octane discoveries although the materials created with it can't be examined in the same way you'd pull apart the nodes in a normal surface. LiveDB materials require a default UV map for your surface, although there is a hack for LightWave owners that autogenerates a UV map.
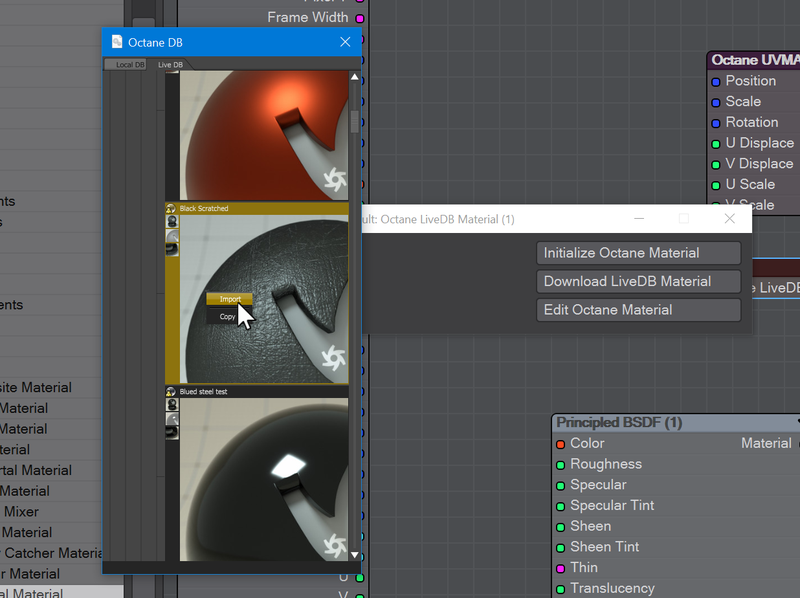
Hitch the LiveDB material to the Material input on your Surface destination node to use it. Double-click the node and first click Initialize Octane Material, then Download LiveDB Material. This will open a window that's very small on a 4K monitor, but click the LiveDB tab at the top, select the material you want and right-click to import. This window will disappear with no notice, but your material has been downloaded, you just need to Reload the IPR window.
There is a third button in the LiveDB node. This is for editing the material and uses an Octane node editor window, not LightWave's. You can't see the edits you've made until you close the editor.
Octane LightWave UV hack
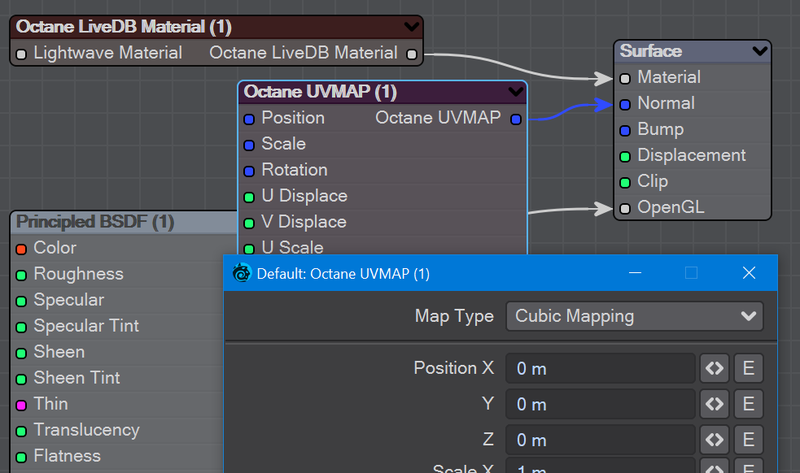
If you don't have a UV map for your object, you can use the Octane UVMAP node. It plugs into the Normal input of your Surface node, and can be edited to choose the type of mapping desired. It's not a substitute for a real UV map, but can get you out of trouble on a fast job.
Frequently Asked Questions
FAQ
Remove the free tier prime version of Octane Render that is installed with LightWave 2023 and replace it with your commercial licence following these steps:
- Open Layout.
- Open Master Plugins (Ctrl-Q) and remove the Octane Render Master Control plugin.
- Open the Edit Plug-ins window (Alt-F11) and uninstall LightWave Octane Render (you can search for it in the bar at the top).
- Quit Layout, Modeler and the Hub.
- Delete the Octane folder in your LightWave/support/plugins folder. Install the full version as normal or copy the three files to the same folder.
Open Layout and add the menus again, if needed.
Octane Prime, installed with LightWave, can only run on one machine at a time. If you need to switch machines - to a laptop for work on the go, perhaps - then you need to disable Octane on the first machine to be able to use it on the other. On the first machine, in the Octane Render group, choose Plugin Options. On the first tab, click Licenses Management and in the window that appears, choose Sign out. Close the window and click Ok in the message that appears, then Ok to close the Plugin Options window. There is a 30-minute cooldown period (that you can track on your account page on the Otoy site) after which you can go into Plugin Options > Licenses Management > Activate > sign in, then Enable Plugin on your second machine.
Standard LightWave materials won't work in Octane. To get the best results resurface your objects using Octane materials. Refer to the list of Octane materials above.
Loading a standard LightWave scene - whether 2015 and lower or 2018+ - will require updating to Octane materials, lights, environments and camera(s). Before you do that, Octane won't have anything it can work with, hence the black screen.
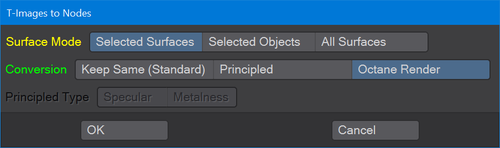
Because of a problem in the 2020+ SDK, Automatic conversion isn't working right now. You can still use the three other options (Diffuse, Glossy and Specular). Using the Pro Tool LD_Convert T-Nodes, you can convert 2015-style Surfaces to modern LightWave or Octane surfaces
While it's true that you are forced to create new surfaces for Octane, you don't have to lose your original surfaces for VPR. Each Octane material has an entry at the bottom for LightWave materials. Just pipe your existing LightWave material in here and the Octane material will be used when rendering in Octane, the LightWave material when using VPR.
Otoy's licensing says that the free tier cannot be used for network rendering, you need a paid licence
Otoy requires an always-on Internet connection, so without that, I'm afraid you will not be able to use Octane's free tier. Otoy has an offline dongle-based license using a yearly OctaneRender Studio+ subscription license, available here.
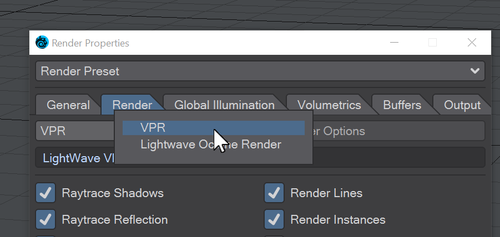
Go to the Render tab and choose Render Options (Ctrl-P). On the Render tab of this window, you can switch between VPR and LightWave Octane Render. This is a permanent setting, you won't need to keep changing it with each scene.