LW video tutorials
Video training
Defined chapters
All chapters
| Image | Content |
|---|---|
|
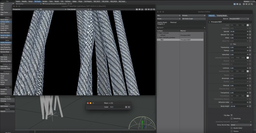
Texturing Fiber FXTexturing FiberFX in LightWave 3D involves applying detailed textures to the fibers created with the FiberFX tool, enhancing their realism and visual appeal. This process allows for the customization of fiber properties such as color, specularity, and transparency, enabling the creation of a wide range of effects from realistic hair and fur to fantastical strands. By adjusting these texture settings, artists can achieve the desired look and feel for the fibers, ensuring they blend seamlessly with the rest of the scene and contribute to the overall visual narrative. |
|
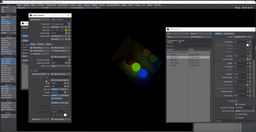
Object as Light SourceIn LightWave 3D, using an object as a light source involves applying luminous properties to the object, enabling it to emit light within the scene. This is achieved by adjusting the object's material settings to increase its luminosity value, effectively turning the object into a source of light. This technique allows for creative lighting effects, such as glowing objects or scenes illuminated by specific shapes, enhancing the atmosphere and realism of the 3D environment. |
|
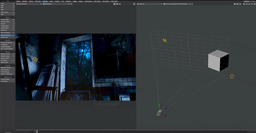
LightWave3D to Element3D and Camera MatchTransferring models from LightWave 3D to Element 3D involves exporting your LightWave models into a format compatible with Element 3D, typically OBJ or C4D, to utilize them within Adobe After Effects for advanced visual effects and motion graphics. This workflow enables the seamless integration of 3D elements into video projects, leveraging Element 3D's powerful rendering and animation capabilities. Camera Match in LightWave 3D is a technique used to align the virtual camera within LightWave to match the perspective and position of a camera used in a live-action shot. This process involves analyzing the original footage to extract camera data, which is then replicated in LightWave 3D's camera settings. The result is a 3D scene that perfectly aligns with the live-action footage, allowing for the integration of 3D elements into the video with accurate perspective and lighting, enhancing the realism of the composite. |
|
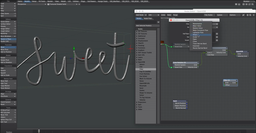
Typography using Splines, Particles, and OpenVDBCreating typography using Splines, Particles, and OpenVDB offers a sophisticated approach to designing complex and dynamic text effects. Splines can be used to outline the desired text shapes, providing a flexible framework for defining the typography's contours. Particles can then be employed to fill or surround these spline-defined paths, adding motion and life to the text for effects such as swirling letters or text that appears to be composed of moving elements. OpenVDB integration allows for the creation of volumetric effects around or within the text, such as smoke, fire, or fluid simulations that interact with the typography. |
|
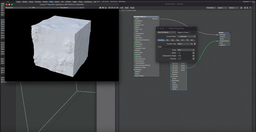
Primitive Shape to MeshConverting a primitive shape to a mesh in LightWave 3D is a fundamental process that allows for more detailed and customized modeling. This transformation begins with the creation of a basic geometric shape, such as a sphere, cube, or cylinder, which serves as the starting point for your 3D model. By converting a shape into a mesh, you unlock the ability to perform more complex modifications. You can add, delete, or move vertices; create new edges and faces; and sculpt the mesh to achieve the desired form and detail level. |
|
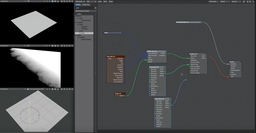
Light - WavesCreating light waves in LightWave 3D involves using the software's comprehensive lighting tools and features to simulate the behavior of light and its interaction with objects within a 3D environment. This process starts by selecting a suitable light source from the various types available, such as point lights, spotlights, area lights, or even global illumination, to mimic real-world lighting conditions. You then adjust the light's properties, including its intensity, color, and falloff, to shape the desired effect. For creating waves or patterns of light, you can use animated textures, volumetric lighting for atmospheric effects, or manipulate the light's position and parameters over time through keyframing. |
|
Attach to AgentThe "Attach to Agent" feature in LightWave 3D is a powerful tool designed to streamline the process of linking objects or elements to moving characters or agents within a scene. This functionality is crucial for animators and visual effects artists who need to create interactions between characters and their accessories, such as weapons, clothing, or other handheld items, ensuring that these objects move seamlessly with the character throughout the animation. |
|
Bullet Dynamics Animate AntennaBullet Dynamics in LightWave 3D provides a robust framework for simulating real-world physics within digital environments, and its application to animate antenna-like structures showcases the engine's versatility and power. By leveraging Bullet Dynamics, artists and animators can create realistic, physics-based movements of antennas, whether they're attached to vehicles, buildings, or any other objects within a 3D scene. This tool allows for the simulation of natural bending, swaying, and oscillation behaviors that occur as a result of wind, movement, or other forces, adding a layer of realism to animations that static models can't achieve. |
|
Bullet - OpenVDB - Part 1The Bullet and OpenVDB integration in LightWave 3D represents a powerful synergy between real-time physics simulation and volumetric modeling capabilities, offering artists sophisticated tools for creating highly realistic animations and effects. Bullet, a real-time physics engine, enables the simulation of complex interactions between objects, such as collisions, explosions, and rigid or soft body dynamics. This allows for the creation of natural and physically accurate movements within the 3D environment. On the other hand, OpenVDB brings advanced volumetric data management, enabling the creation and manipulation of complex smoke, fire, and fluid simulations with high efficiency and detail. |
|
Bullet - OpenVDB - Part 2
|
|
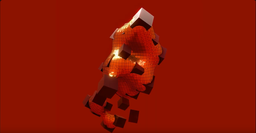
Burning EdgesThe "Burning Edges" effect in LightWave 3D is a specialized technique that allows artists to simulate the appearance of heat, fire, or energy along the edges of objects, enhancing the visual impact of scenes with dynamic, glowing effects. This can be particularly effective in scenarios requiring a visual representation of extreme heat, magical energy, or other forms of radiant energy emitting from an object. By utilizing LightWave 3D's advanced texturing, shading, and lighting tools, users can precisely control the intensity, color, and spread of the burning effect to match the desired visual outcome. This effect is achieved through a combination of procedural textures, gradients, and possibly node-based shading to create an animated, luminous edge that appears to burn or glow. |
|
The Rotate ToolThe Rotate tool in LightWave 3D stands as a fundamental component of the software’s robust toolkit, enabling artists and designers to manipulate objects and elements within a three-dimensional space with precision and ease. This tool allows for the rotation of models, components, or individual vertices around specific axes, offering the ability to precisely adjust the orientation of objects to achieve the desired composition or animation effect. Whether it's for positioning characters, adjusting the angle of environmental objects, or creating dynamic motion sequences, the Rotate tool provides users with the control needed to fine-tune their creations. Its intuitive interface and real-time feedback ensure that even the most intricate rotational adjustments can be made with confidence, contributing significantly to the workflow efficiency and creative flexibility within LightWave 3D. |
|
The Rotate Tool 2The Rotate tool in LightWave 3D stands as a fundamental component of the software’s robust toolkit, enabling artists and designers to manipulate objects and elements within a three-dimensional space with precision and ease. This tool allows for the rotation of models, components, or individual vertices around specific axes, offering the ability to precisely adjust the orientation of objects to achieve the desired composition or animation effect. Whether it's for positioning characters, adjusting the angle of environmental objects, or creating dynamic motion sequences, the Rotate tool provides users with the control needed to fine-tune their creations. Its intuitive interface and real-time feedback ensure that even the most intricate rotational adjustments can be made with confidence, contributing significantly to the workflow efficiency and creative flexibility within LightWave 3D. |

|
The Rotate Tool 3The Rotate tool in LightWave 3D stands as a fundamental component of the software’s robust toolkit, enabling artists and designers to manipulate objects and elements within a three-dimensional space with precision and ease. This tool allows for the rotation of models, components, or individual vertices around specific axes, offering the ability to precisely adjust the orientation of objects to achieve the desired composition or animation effect. Whether it's for positioning characters, adjusting the angle of environmental objects, or creating dynamic motion sequences, the Rotate tool provides users with the control needed to fine-tune their creations. Its intuitive interface and real-time feedback ensure that even the most intricate rotational adjustments can be made with confidence, contributing significantly to the workflow efficiency and creative flexibility within LightWave 3D. |
|
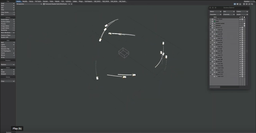
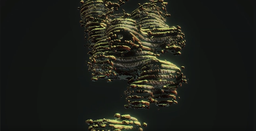
Audio SpectrumIn LightWave 3D, the audio spectrum feature offers a unique and creative approach to synchronizing visual elements with sound, enabling artists to generate dynamic animations that respond to audio cues. This functionality is particularly useful for creating visualizations of music, sound effects, or any audio track where the visual intensity or movement is driven by the audio amplitude or frequency. By importing audio files into LightWave 3D, animators can map the audio spectrum data to various properties of objects, such as scale, rotation, or color, allowing these elements to animate in harmony with the sound. This can result in captivating visual experiences, such as beat-responsive animations, where objects pulse with the rhythm of the music, or complex scenes where the environment changes in response to soundscapes. |
|
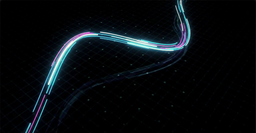
Flight PathsFlight paths in LightWave 3D represent a sophisticated toolset for animating objects along predefined trajectories, enabling creators to simulate the motion of objects through 3D space with precision and realism. This feature is especially valuable in scenarios where objects need to follow complex, curvilinear paths, such as aircraft in flight, satellites orbiting a planet, or even fantasy creatures weaving through an enchanted forest. By utilizing LightWave’s intuitive graph editor and motion options, animators can define these paths, adjust timing, and fine-tune the spatial dynamics of the motion to achieve the desired effect. Moreover, LightWave 3D allows for the integration of dynamics and particle systems with flight paths, offering the possibility to create more complex simulations like swarming behavior or the trail of a jet. This flexibility makes flight paths a powerful component in the animator's toolkit, facilitating the creation of captivating and dynamic sequences that enhance storytelling and visual impact. |
|
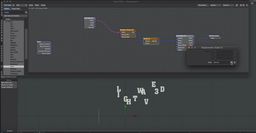
LightWave3D to Element3D OBJ SequenceCraft realistic flag animations in After Effects using Element 3D and an OBJ sequence, tailored for projects under tight deadlines. The tutorial guides viewers through setting up UV maps for OBJ export, exporting the flag animation as an OBJ sequence through a third-party script, and then importing this sequence into Element 3D for animation. Key steps include applying PBR textures, animating with frame offset, and customizing the flag's appearance. Additionally, it offers a time-saving tip on adding editable captions to the flag, making it ideal for creating versatile flag animations swiftly and efficiently. |
|
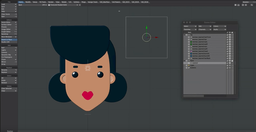
Joystick RigAn innovative approach to animating designs in a way that sidesteps the complexities of traditional rigging techniques like bones, weights, or nodes. Drawing inspiration from a rigging script for After Effects known as Joysticks and Sliders, the video guides viewers through the process of bringing a character to life using a singular joystick-like controller, coupled with the addition of accessories in After Effects. |
|
Part Move BasicsPart moves are an essential feature for animators and designers, allowing for the meticulous manipulation and animation of individual parts of a model. This functionality is particularly useful in scenarios where specific components of an object need to be animated independently, such as the moving parts of a vehicle or the limbs of a character. By enabling precise control over the movement and rotation of these parts, LightWave 3D users can achieve a high level of realism and dynamism in their animations, enhancing the overall visual storytelling and bringing their creative visions to life with greater ease and flexibility. |
|
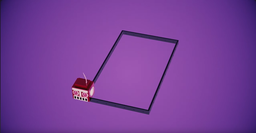
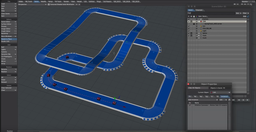
Sticking Wheels to the TarmacThis video tutorial delves into the creation of a captivating 3D animation, featuring a vehicle (initially depicted as a low poly arrow for simplicity) navigating a track complete with ramps, and meticulously outlines the process to ensure the vehicle remains in seamless contact with the track. The tutorial kicks off by addressing initial hurdles related to spline control and rotation alignment, necessary for synchronizing the vehicle's trajectory with the track's layout. |